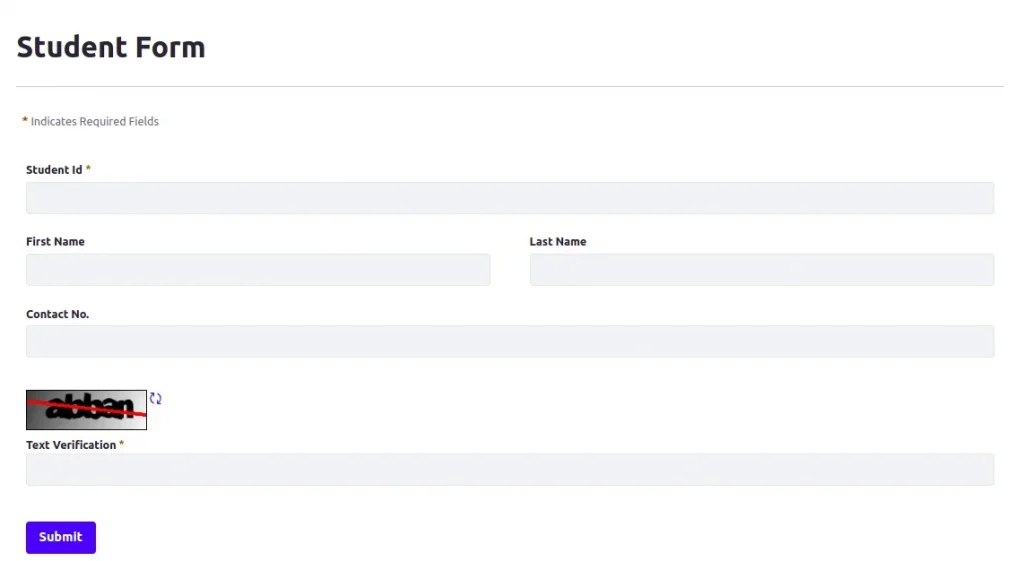
Problem : Save the data in Liferay objects using Liferay forms or create forms using Liferay objects.
Solution : We can use Liferay’s OOTB feature to make forms using Liferay objects.
Benefits :
- Liferay provides the storage types to forms.
- With this storage types we can create our form using Liferay Form and save the form entries into Liferay Objects
Prerequisites :
- Liferay portal 7.4 +
- Basic knowledge of Liferay
Environment Requirements :
- Liferay Portal
Following are the main steps to create Liferay forms using Liferay objects:
- Create the Liferay Object.
- Map a Liferay form with a Liferay Object.
1) Create the Liferay Object :
For information on creating Liferay objects, checkout our Object Blog2) Map a Liferay form with a Liferay Object. :
To map a Liferay form with a Liferay object, follow the below steps.- Make Liferay Form.
- Open the Product Menu (◧) then click the compass icon (⊘)on the Site Administration menu. Select the site where the form will be created.
- Click Content & Data → Forms.
- Click the Add button (╂). The form builder view appears.
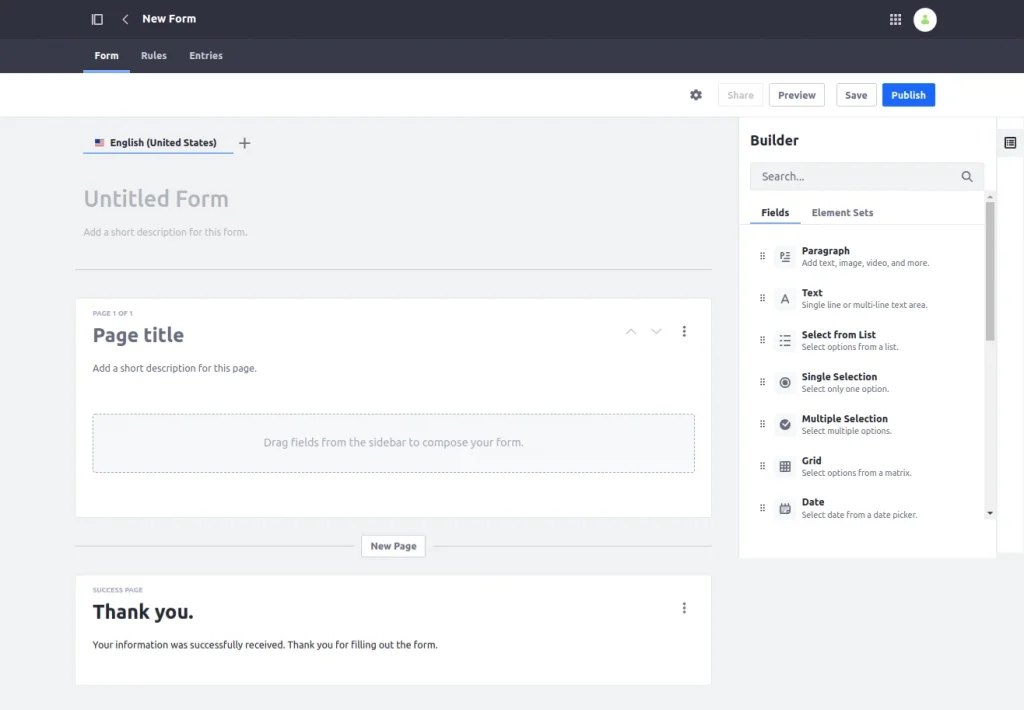
- Enter a name for the form; here I gave the name “Student Form.”
- Enter a short description(optional field) which describes the form.
- Set the storage type.
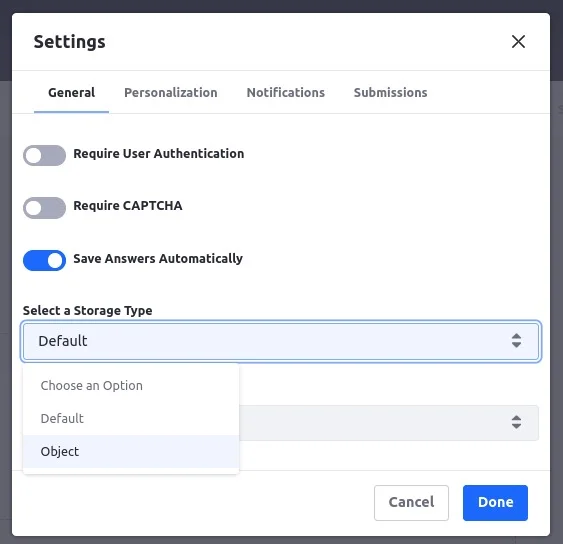
- Click on the settings icon., It will open a pop-up window.
You can check the description of these settings here.
- Click on the settings icon., It will open a pop-up window.
-
- Select the storage type as “object.”
Note:Default storage type will save form entries into forms.
- Select the storage type as “object.”
- Choose the object from the list that you want to use to create a form with.
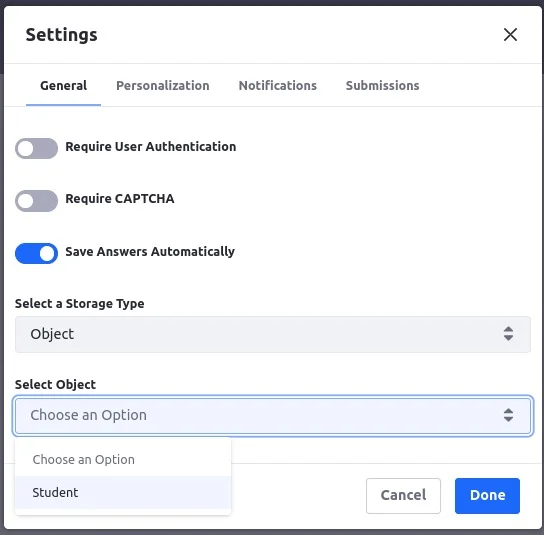
- Click Done. It will save the setting, and you will be able to use the object fields as form fields.
- Assign the object field with form.
- Enter a page name,otherwise it will use the default value.
- Make a form field compatible with the desired object field and add it.
For a list of which form fields work with each kind of object field, see Field Compatibility Reference. - Go to the Advanced setting of that field.
- Check that an object’s field is available in the Object Field drop-down menu.
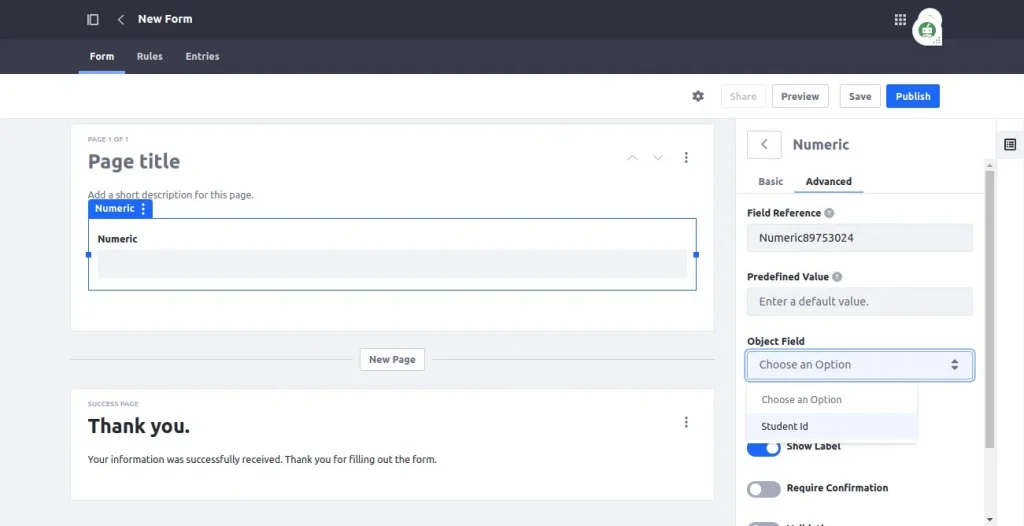
- Select the desired field from the object fields.
- If the selected field is mandatory in object it the form will automatically make it required.

-
- Now is the time to finish the remaining form parts.
- Publish the form once it has been created.
Note: If all required object fields are not mapped to a form field, the form cannot be published.
- Open the form and fill it out.
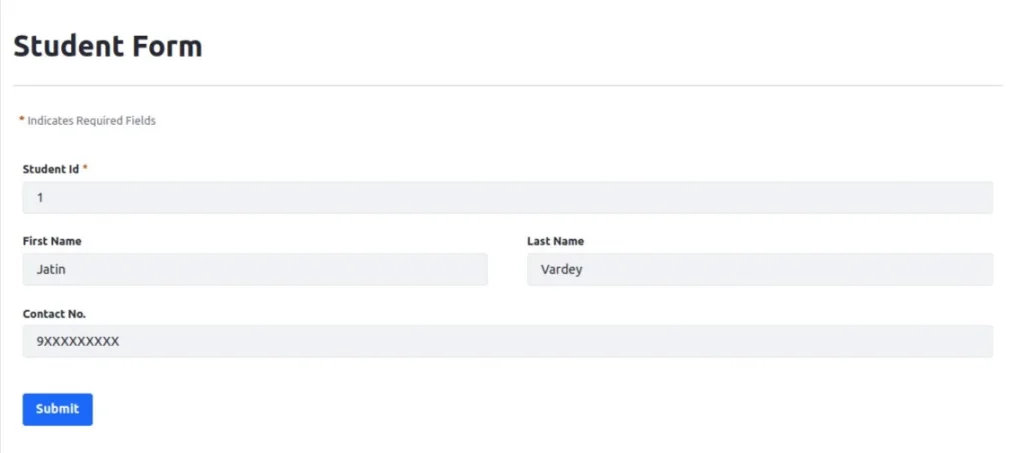
-
- Your form will be submitted, and the information you’ve provided will be saved in the object.
- You can check the object entries to verify it with your form values.
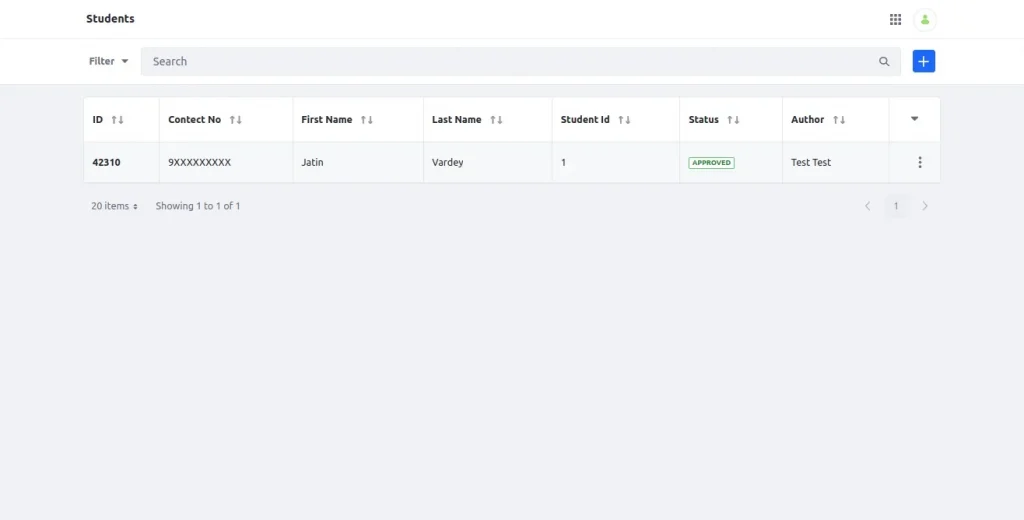
- Add object permission to the Guest role.
- Currently you will be able to fill the form as Admin User. But for guest users you will be required to give the permission.
- Go to the Control Panel and then click on Users → Roles.
- Open Guest User → Define Permission.
- Search your object name and open it.
- Tick “Add Object Entry” and Save.
- Currently you will be able to fill the form as Admin User. But for guest users you will be required to give the permission.
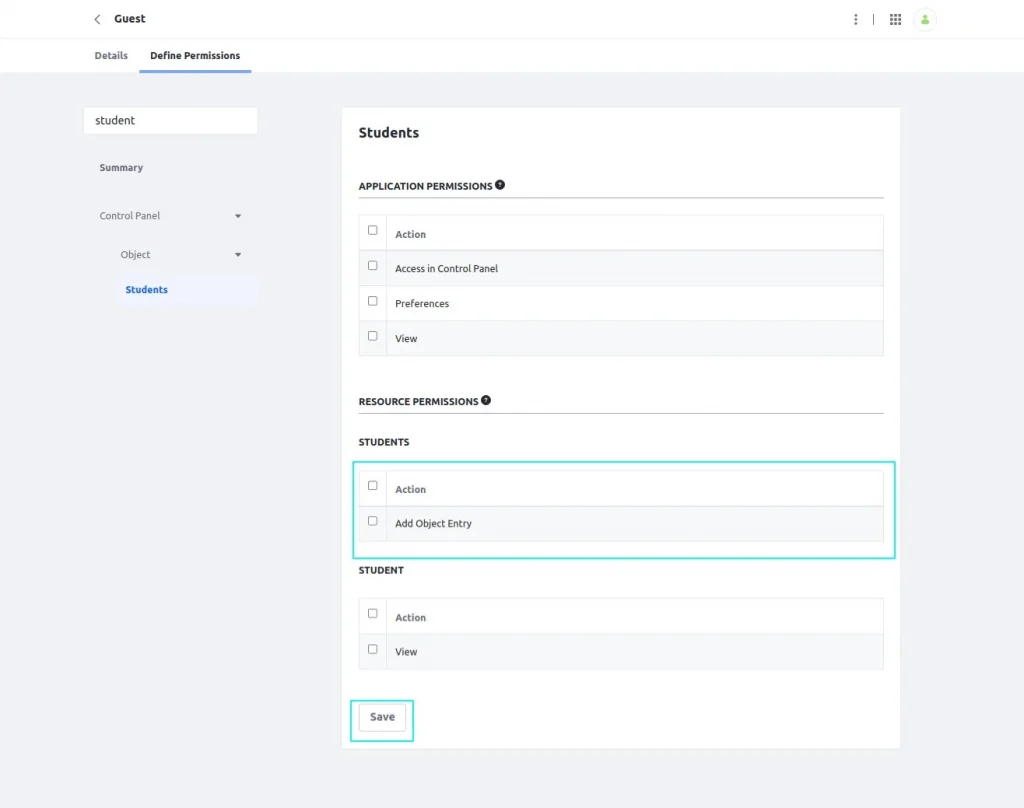
- Now you will be able to fill the form as any user.
- Add a Captcha to form.
- There is one more thing you can do to your form is enable liferay captcha.
- Open your form and click on settings.
- Enable Require CAPTCHA
- There is one more thing you can do to your form is enable liferay captcha.
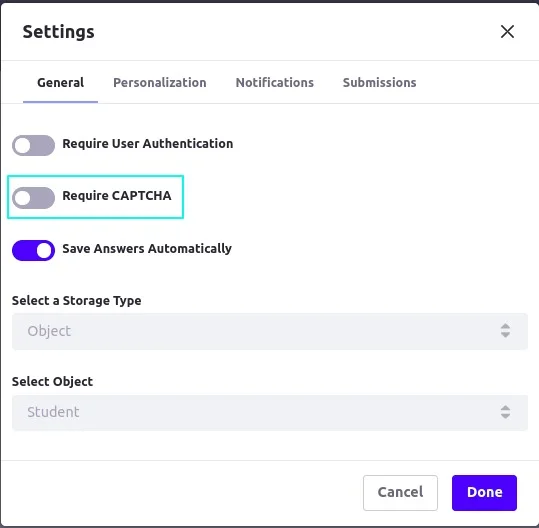
- Click done and save the form. It will enable the captcha for the form.
- You can open the form and check that it has captcha now.
