Problem: While working with the Liferay projects, you may need to create a configuration from the control panel to use Google functionalities link Google sheets. Google docs, Google slide.
Solution: You can use Google APIs to use Google’s features in Liferay without any program or code.
Benefits :
- We don’t need to download and upload documents into Google drive from Liferay document and media or Liferay document and media from Google drive.
- This configuration provides functionality like the user can log in to their individual Google account and save their documents in Google drive.
Prerequisites :
- Liferay DXP/Portal 7.2+
- Basic knowledge of Liferay
- Google Account
Environment Requirements :
- Liferay Portal or DXP
Configure Your Google Project
Following steps to create or configure your Google project so it can share with your Liferay DXP or Liferay Portal:
- Go to the Google API Console. If you don’t have an appropriate project, create a new one.
- Enable the Google Picker API and Google Drive API for your project. For that, Go to the API & Services -> Enable APIs and Services.
- Search Google Picker API and Google Drive API and enable both APIs for configuration in Liferay.
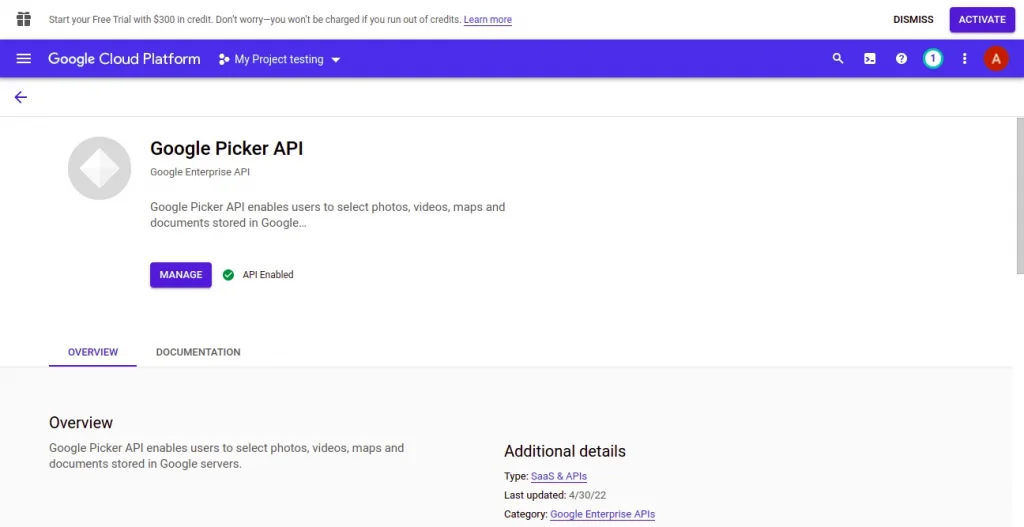
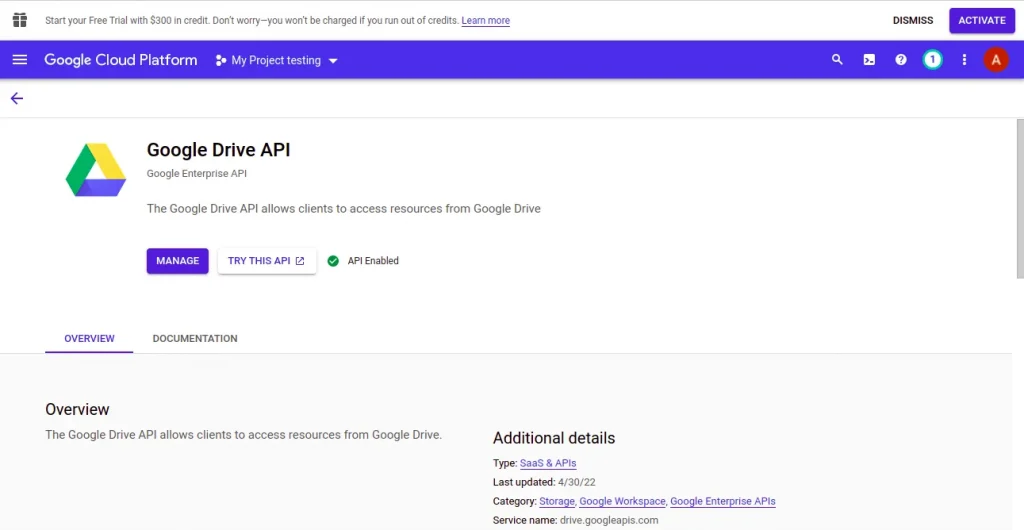
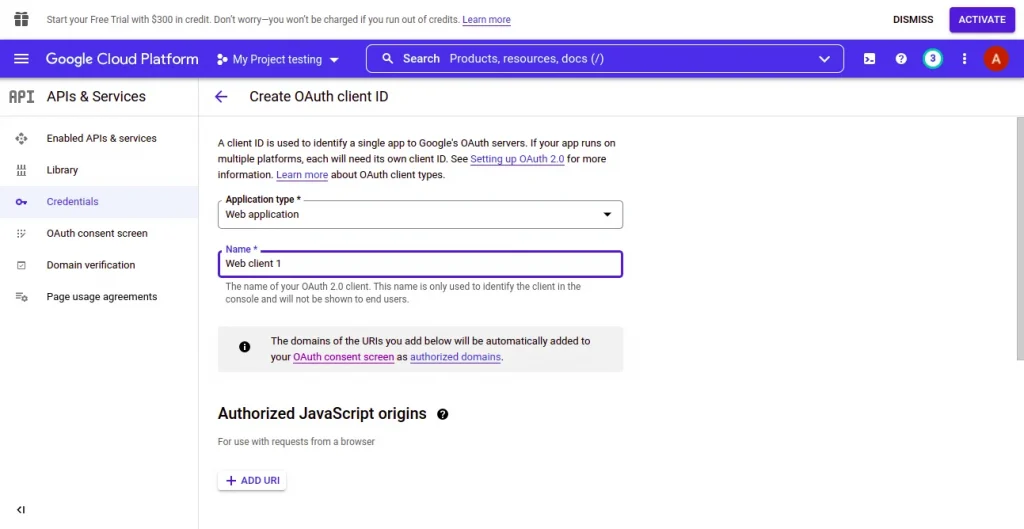
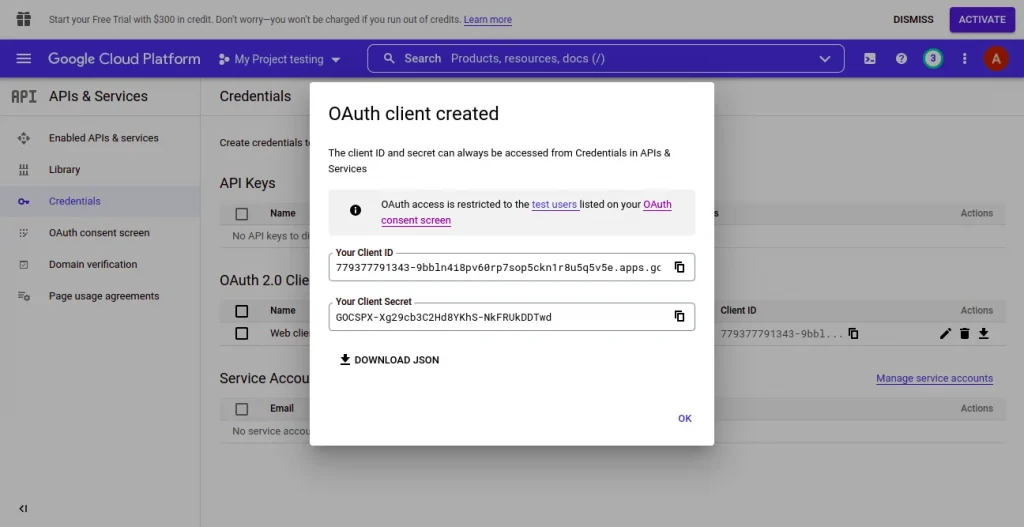
Create OAuth client ID for generating Client ID and Client Secret.
- For creating an OAuth 2 client ID in your Google project. Go to the credentials -> create credentials -> OAuth client ID. After that, Enter the following values to consider as an example while creating your client ID:
- Application type: Web application
- Name: Web client 1
- Authorized JavaScript origins:[liferay-instance-URL] (e.g.,http://localhost:8080 is the default for local development machines)
- Authorized redirect URIs: [liferay-instance-URL]/oath2callback (e.g., http://localhost:8080/o/document_library/google/oauth2 is the default for local development machines)
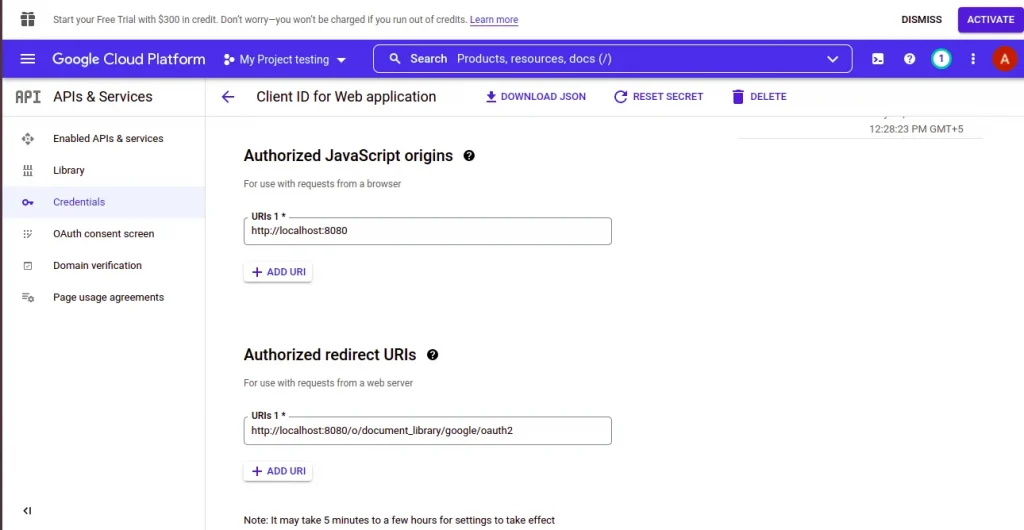
Create your API key
- Create a new API key in your Google project.
- Go to the Credentials -> Create Credentials -> API key
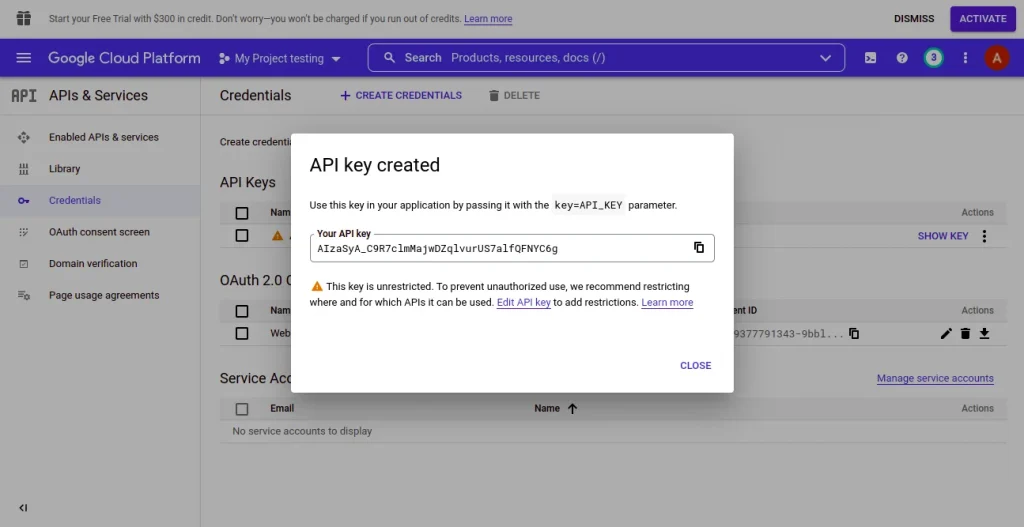
Your new OAuth client ID, client secret, and Google Picker API key are now displayed on your Google project’s Credentials section.
App Registration for authentication
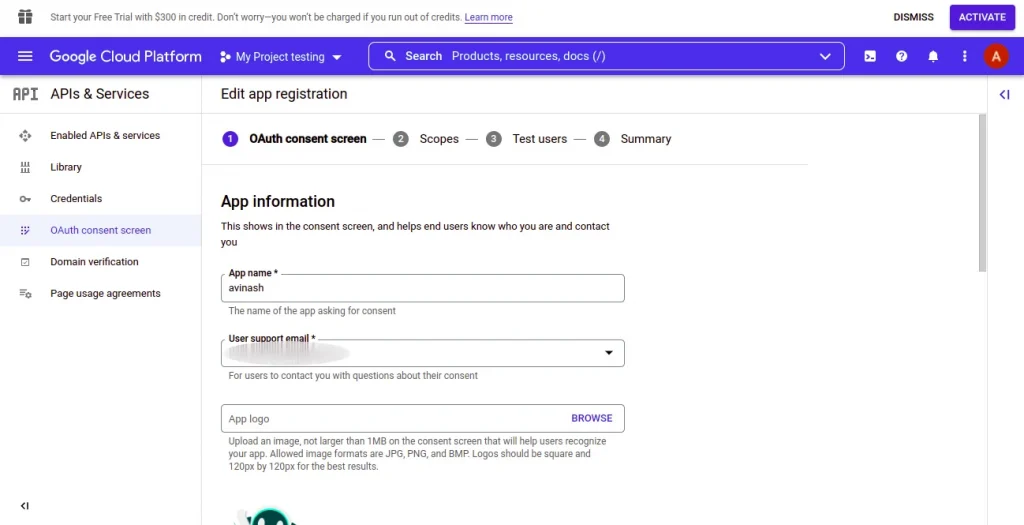
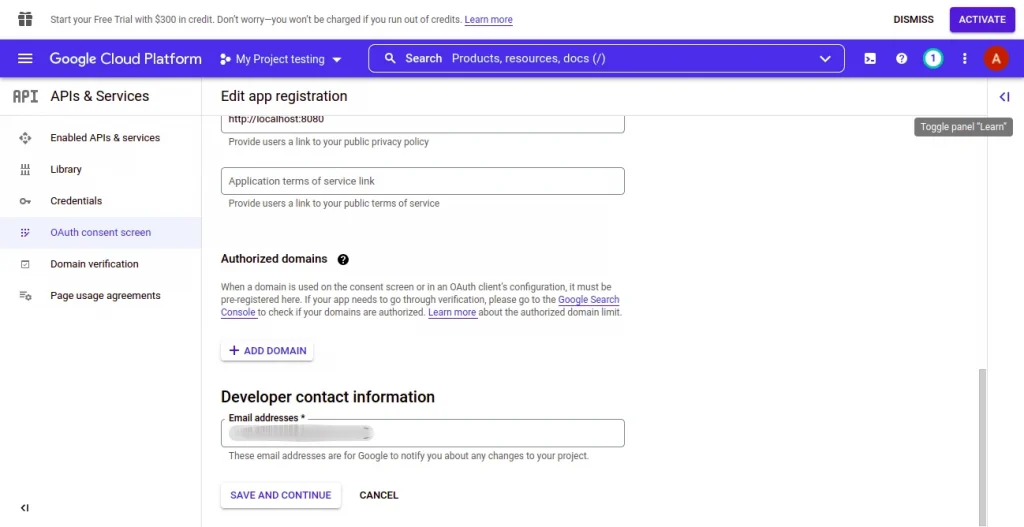
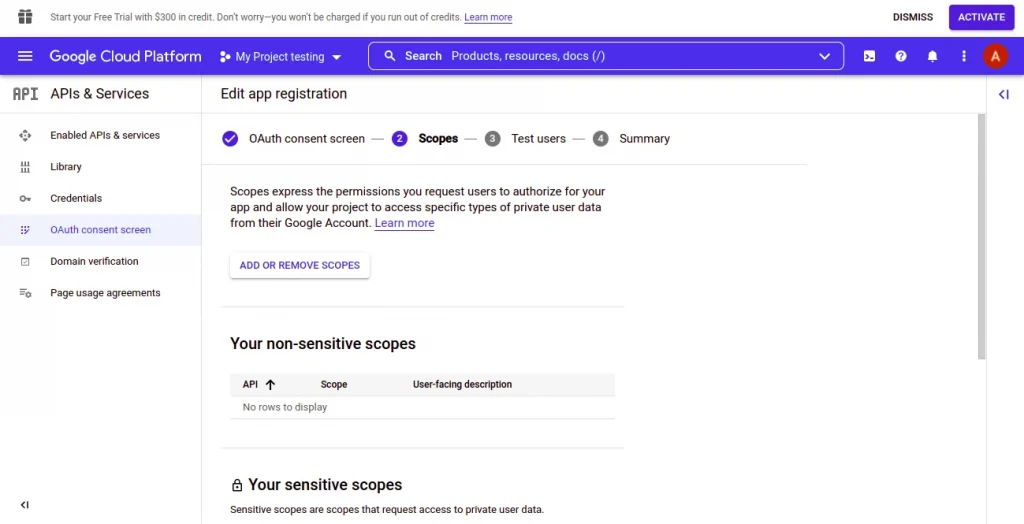
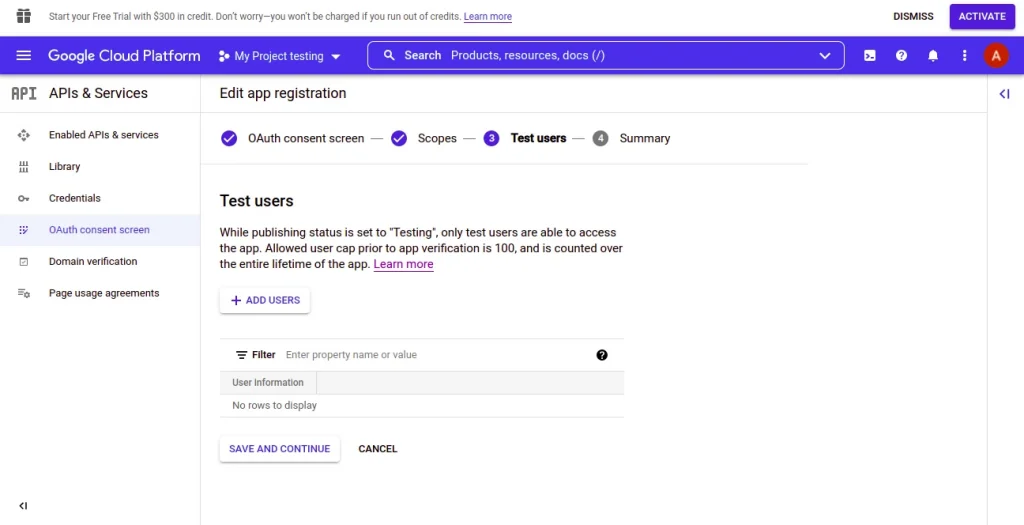
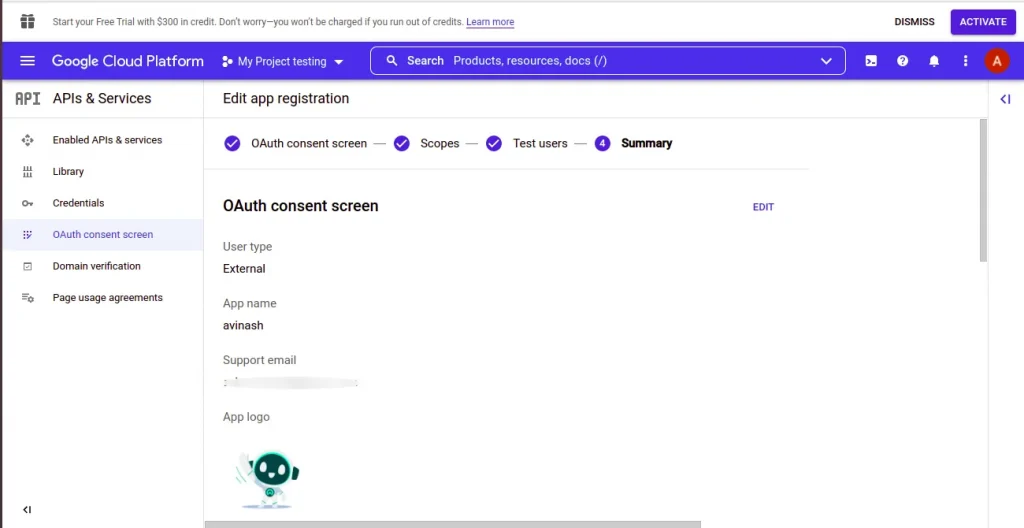
For the security reasons and authentication of particular users you need to complete your App registration.- Go to the OAuth consent screen and complete your App registration
-
- App Name: Google Docs ( Your App name)
- User support email: info@ignek.arisetechno.com
- User type: External
- Logo: Browse your logo
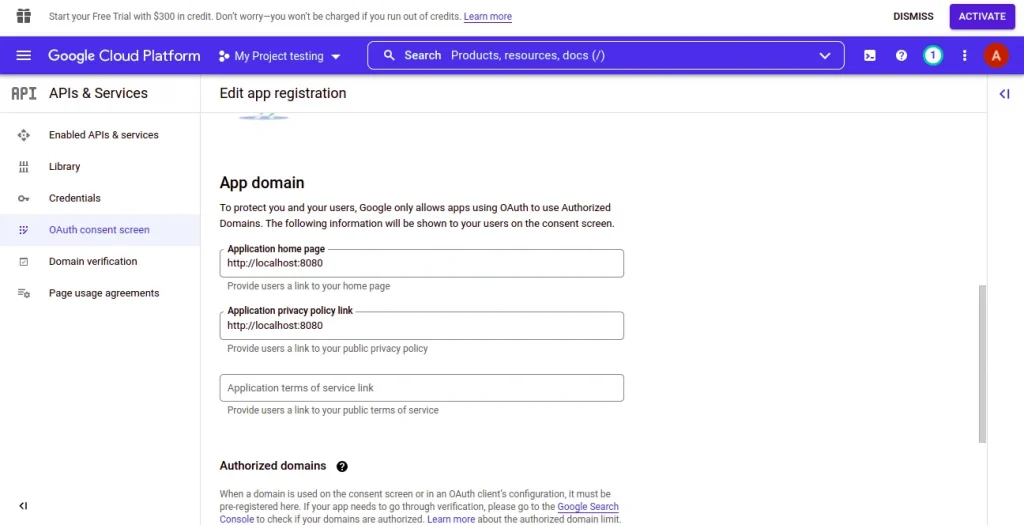
- Application home page: (e.g., http://localhost:8080 is the default for local development machines)
- Application privacy policy link: (optional: if your application has a privacy policy)
- Application terms of service link: (optional: if your application has terms of service)
- Authorized domains: (optional: if your application has a domain)
- Developer contact information
- Email Address: info@ignek.arisetechno.com
- Save and Continue all other steps of App registration
Configure Liferay DXP’s Google Apps Settings
Configure your Liferay DXP or Liferay Portal with the client ID and API key which you created earlier :
- Go to the Control Panel → Configuration → Instance Settings -> Content And Data -> Document and Media.
- In Virtual Instance Scope, Go to the Google Drive section.
- For Google Client ID and Client Secret, enter the Google OAuth client ID and Client Secret which you have created.
- For Google Apps API Key, enter the Google API key which you have created.
- Save your changes.

Creating or Editing Your Files
After the primary configuration steps are complete, you can create or edit files from the Document and media which link to files in Google Drive. Following steps to create or edit files:
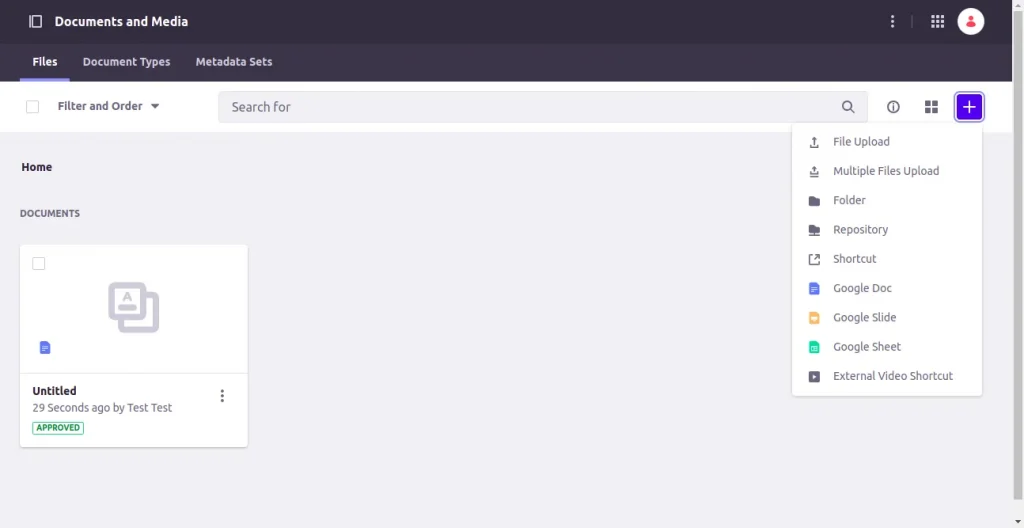
- In your Document Library, click the Add button (+) and select Google Docs. It will redirect to the log-in page of your Google account.
- After the login, you can create your Google Doc, Google Slide, or Google Sheet.
- Click Publish.
