In this blog , We’ll explore the process of dockerizing spring boot applications in an isolated Environment.
Prerequisites:
- JDK
- Intellij idea (or eEclipse)
- Docker
Why Docker?
Docker is an open platform that can be used to deploy applications in secure containers. Docker containers are lightweight, simple to configure and work consistently in IT environments. Most Bitnami applications are available as Docker containers and offer all the usual Bitnami benefits: security, optimization, consistency and frequent updates.
Let’s start by creating a simple Spring Boot application that we’ll then run in a lightweight base image running.
Docker is a popular platform used for developing, shipping, and running applications. It enables developers to package their applications and their dependencies into standardized units called containers. These containers can then be easily moved between environments, such as development, testing, and production, ensuring consistency across different systems.
Docker has become an integral part of modern software development and deployment for various reasons.
In modern software development, creating applications that are both efficient and easily deployable has become a goal. Spring Boot, a popular Java-based framework for building robust, scalable applications, when combined with Docker, streamlines the deployment process and enhances portability.
combining Spring Boot with Docker simplifies the deployment of applications, enhancing flexibility and efficiency in the software development lifecycle. This approach not only facilitates easier management but also ensures consistency and reliability across various deployment environments.
As a prerequisite, ensure you have docker installed on your local machine.
You can refer to the installation instructions from Install Docker .
Let’s move step by step to the Spring Boot Side,
- Now let’s proceed with setting up the spring boot project as mentioned below (with the use of Spring Initializer),
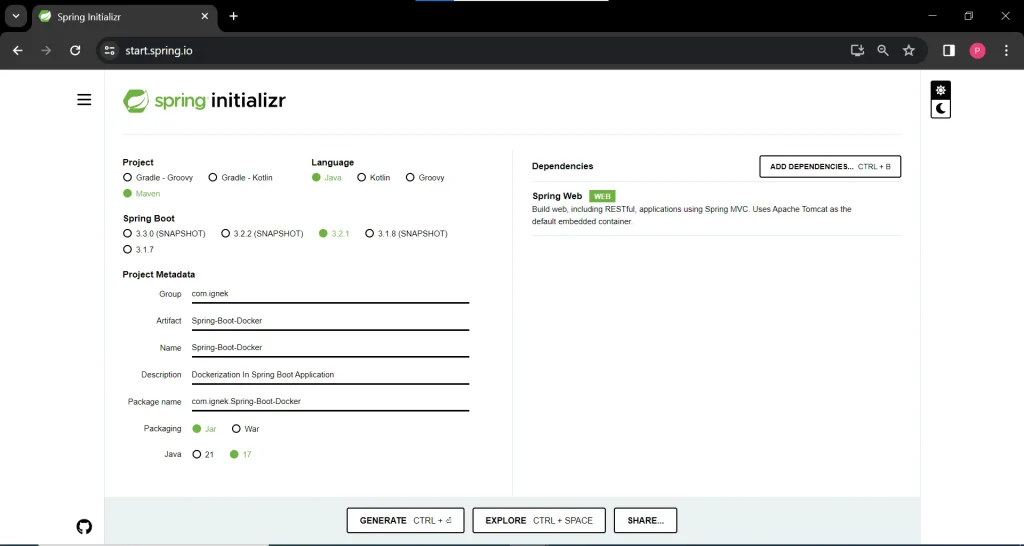
Generate the project in your Local Then extract it and Open Into in your IDE.
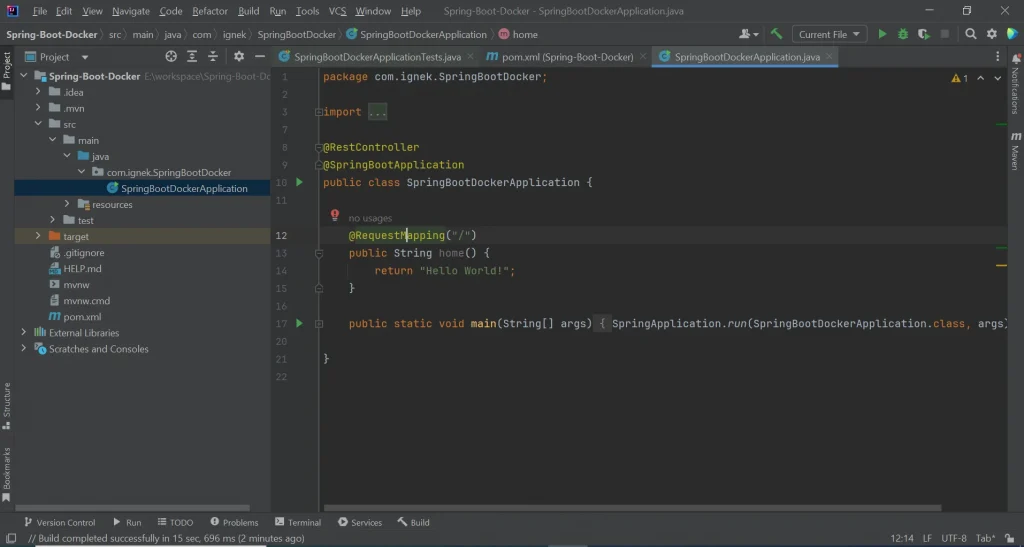
Then create one controller with a specific endpoint.
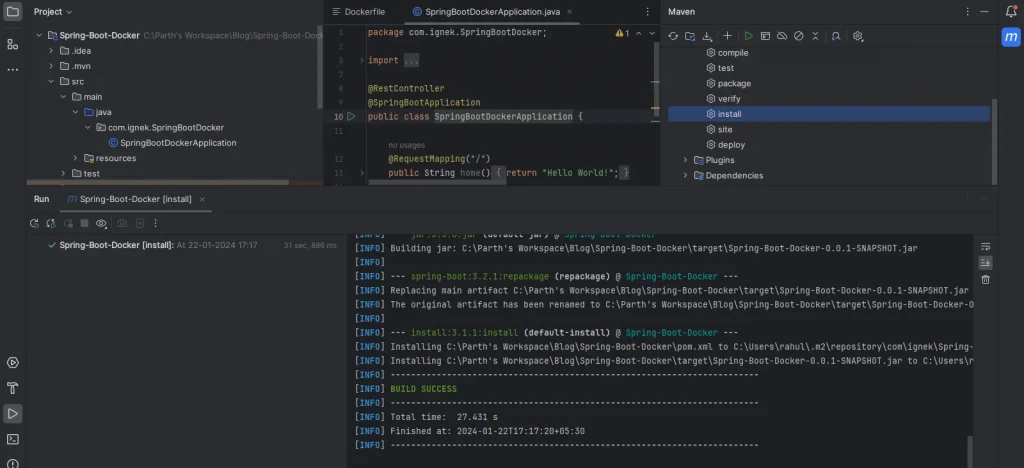
Before creating the Docker image for this project, it’s essential to generate the JAR file by following the steps outlined below.
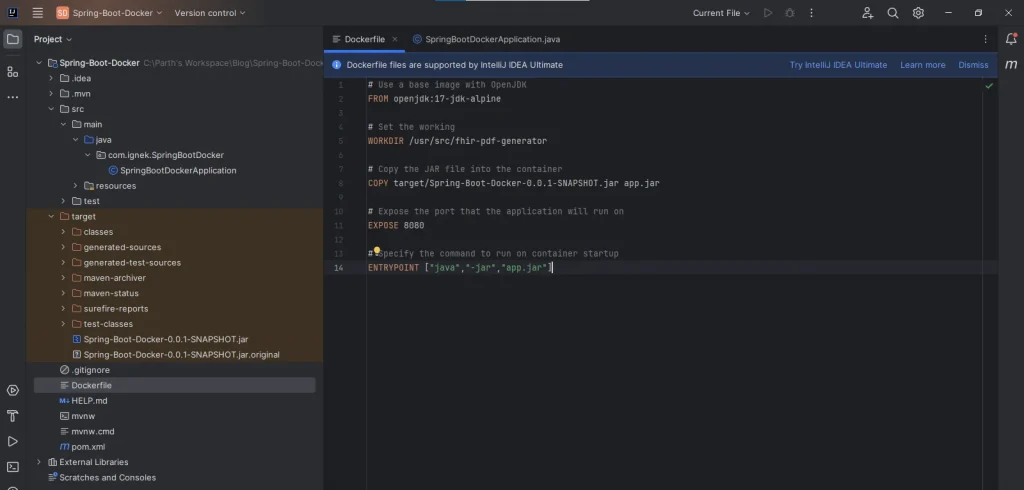
Create a File at your Root Directory with name “Dockerfile” ,

And mentioned all the details as per our project ;
|
# Use a base image with OpenJDK FROM openjdk:17-jdk-alpine # Set the working WORKDIR /usr/src/fhir-pdf-generator # Copy the JAR file into the container COPY target/Spring-Boot-Docker-0.0.1-SNAPSHOT.jar app.jar # Expose the port that the application will run on EXPOSE 8080 # Specify the command to run on container startup ENTRYPOINT [“java”,”-jar”,”app.jar”] |
Now, with all the configurations mentioned above, we are ready to create Docker images for our project.
Navigate to the project directory in the command prompt, and execute the following command to build the Docker image:
|
docker build -t springbootdocker . |
With this command, an image named “springbootdocker” will be successfully created.
Note : You can check already exist docker images with use of below command,“Docker images”
Now that your image is created, you can run your project using the following command:
|
docker run -p 8080:8080 springbootdocker |
After executing the above command, if you see output similar to the following, then your setup is successful.

Now , Go to the browser or postman and check the endpoint.

Let Dockerize our Application with implementing compose YML :
If we intend to implement Compose YML, we need to create an additional file in our project.
Navigate to the root directory and create a file named ‘docker-compose.yml’.
version: ‘3’ services: springbootdocker-container: image: springbootdocker:latest build: context: ./ dockerfile: Dockerfile volumes: – /data/springbootdocker ports: – “8080:8080” |
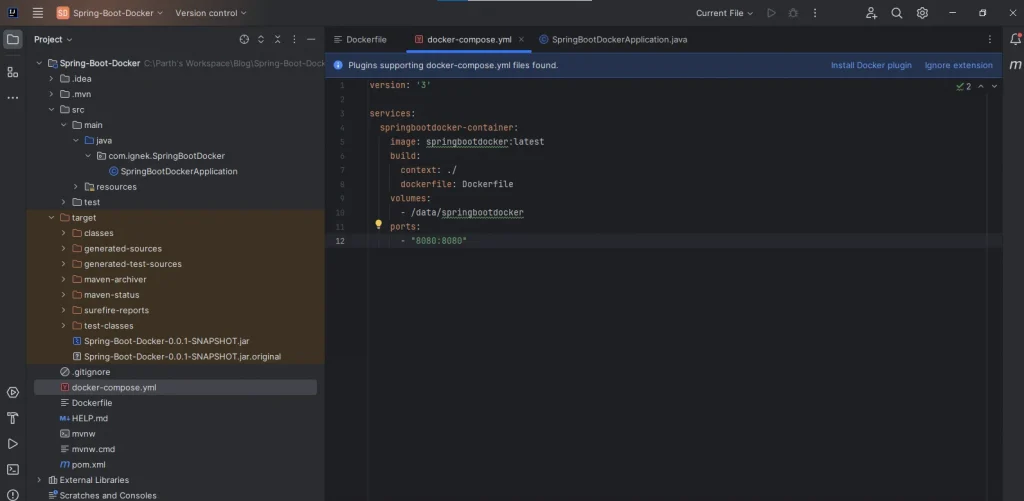
It creates a container named ‘springbootdocker,’ which encapsulates an image of the Spring Boot application.
After applying the configurations mentioned above, execute the following command:
docker-compose up |
If the process runs without any errors and the project successfully starts, test the endpoints as specified in the project.
Congratulations! Our Spring Boot application is now fully dockerized, complete with a docker-compose.yml file.
Additional Note :
After completing the dockerization process, where our image is housed within a container along with necessary configurations, you have two options to incorporate the latest code changes into the running container:
- To update your application with the latest code, you have the choice of either manually deleting the old image and creating a new one or building a new image with the most recent code changes.
- Alternatively, you can rebuild the image located inside the container using the following command.
docker-compose up –build |
Additional Tips:
- Environment Variables: If your application uses environment variables, you can pass them to the Docker container using the -e flag when running docker run.
- Docker Compose: For more complex setups or if your application requires additional services (like a database), consider using Docker Compose. Create a docker-compose.yml file to define multi-container applications.
- Optimizations: Explore ways to optimize your Docker image, such as using a smaller base image or minimizing the number of layers.
Discover the power of Spring Boot Microservices for scalable, modular solutions. Streamline development and deployment for efficient, resilient systems. Let’s build your next-gen microservices architecture together!


