Context contributor provides functionality to inject variables in the Liferay theme. It is able to add variables in header of Liferay Theme. In this example, we will add to our website URL by using Context Contributor in Liferay 7.2.
Prerequisites
- Java
- Liferay portal 7/7.x
Environment Requirement
- JDK 8
- Eclipse
- MySQL
1) Create context contributor class in your module project.
- Go to Liferay workspace project → modules → new.
- Select other → Liferay → Liferay Module Project and click on “Next”.
- Enter the project name.
- Select “Project Template Name” as “template-context-contributor” and click on “Next”.
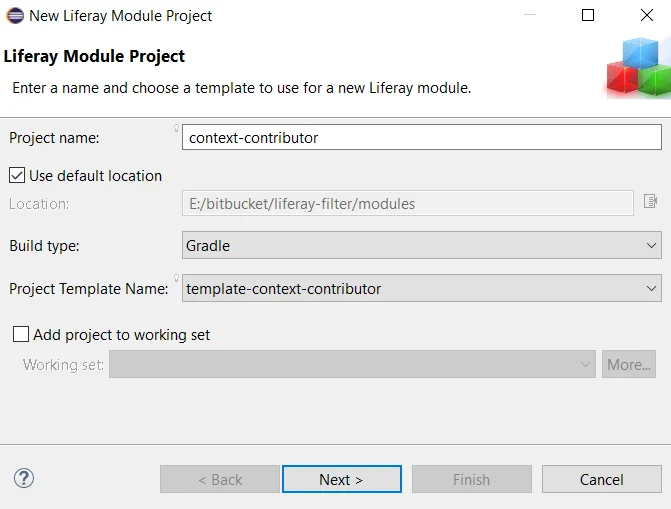
- Enter the package name and click on “Finish”. The necessary file structure will be created as below.
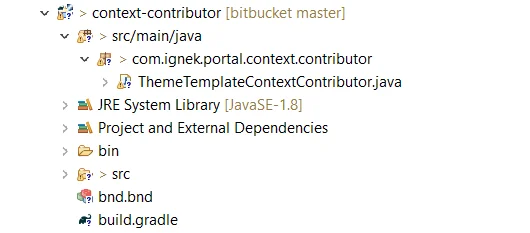
2) Insert the following annotation into above the class declaration.
					// IgnekURL.java
@Component(
	immediate = true,
	property = {"type=" + TemplateContextContributor.TYPE_GLOBAL},
	service = TemplateContextContributor.class
)
There are two types of contributors.
- TYPE_THEME field should be set if you only wish to inject context-specific variables for your theme.
- TYPE_GLOBAL field affects every context execution in Liferay, like themes, ADTs, DDM templates, etc.
Here, we will add to our website URL.
					// ThemeTemplateContextContributor.java
package com.ignek.portal.context.contributor;

@Component(
	immediate = true,
	property = {"type=" + TemplateContextContributor.TYPE_GLOBAL},
	service = TemplateContextContributor.class
)
public class ThemeTemplateContextContributor implements TemplateContextContributor {

	@Override
	public void prepare(Map<String, Object> contextObjects, HttpServletRequest request) {
		String siteURL = "https://ignek.arisetechno.com";
		contextObjects.put("siteURL", siteURL);
	}
}
- Start the Liferay server (if the server is already running then ignore it).
- Deploy your module
3) If you want to see the changes, follow the steps below.
Create structure in Liferay site.
- Go to Liferay site → content & data and click on Web Content.
- Go to Structure and click on the Add(+) button.
- Enter the structure name and drag & drop Text Box from the fields.
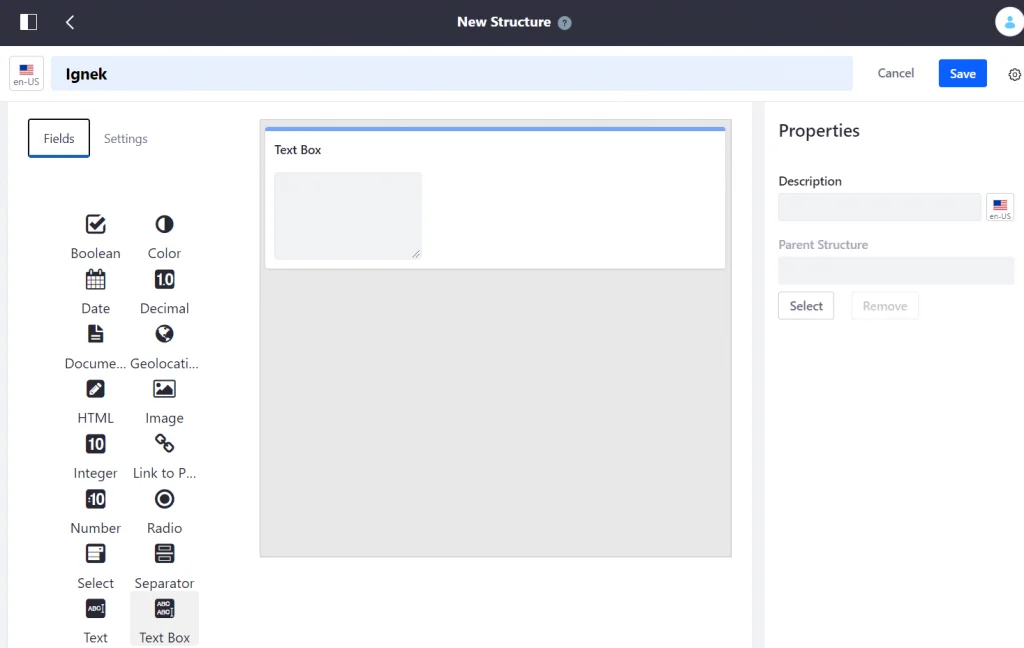
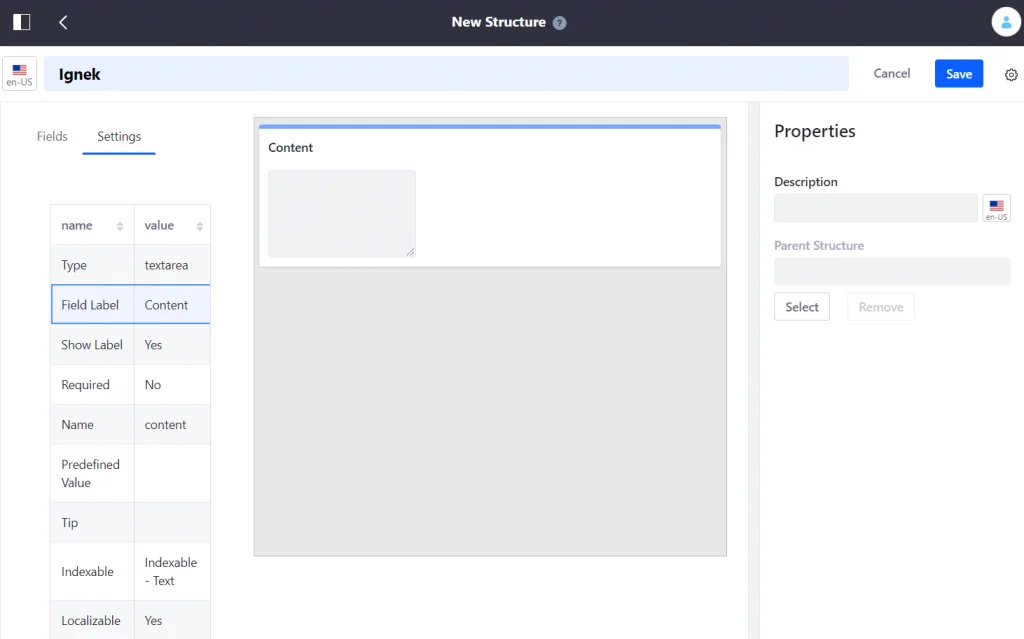
- Click on the Text Box and go to the Settings.
- Change Field Label value to Content and save it.
Create a template for our structure.
- Go to our structure and click on the ellipsis icon → Manage Templates.
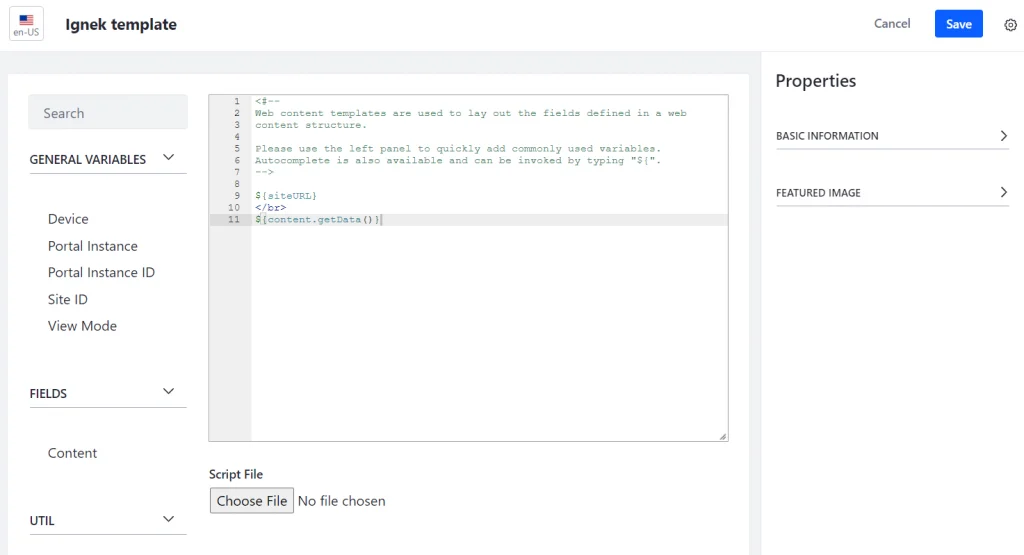
- Go to Manage Templates and click on the Add(+) button.
- Enter the template name → Add below lines in the code section and save it.
					${siteURL}

</br>

${content.getData()}
Create a Web Content.
- Goto Web Content and click on the Add(+) button.
- Now you can see your structure name and click on it.
- Enter the Web Content name and click on publish.

Now, fetch the web content in your Home page.
- Go to Liferay site → click on the Add(+) button.
- Go to Widgets → Content Management → click on Web Content Display.
- Now the screen will look like the image below.

- Click on “Select Web Content to make it visible” → select your web content.
- After that, you can see Configuration pop-up → select “Use a specific template” → select your template and save it.
- Now, you can see your changes on the Home page.
Output

