CAPTCHA is a “Completely Automated Public Turing test to tell Computers and Humans Apart”. It is used in the computer world to determine whether an end-user is human or non-human. Liferay provides necessary API as well as tag library to implement CAPTCHA in your custom portlet. Also you can integrate Google reCAPTCHA in your custom portlet.
Prerequisites
- Java
- Liferay portal 7/7.x
Environment Requirement
- JDK
- Eclipse
- MySQL
Use CAPTCHA in custom portlet
Assuming you’ve already created a Liferay-workspace project Follow below steps to implement CAPTCHA in your custom portlet
1) Create MVC Portlet
- Go to liferay workspace project → modules → new
- Select other → Liferay → Liferay Module Project and Click on Next
- Enter project name
- Select “Project Template Name” as “mvc-portlet” and Click on “Next”
- Enter Package name and Click on “Finish”
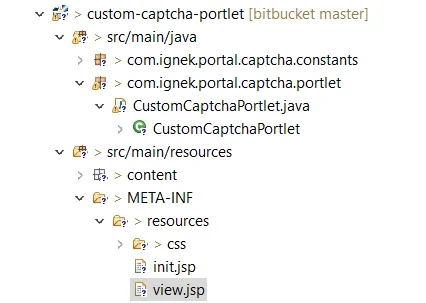
2) Now add below code in view.jsp
					// view.jsp //
<%@ include file="/init.jsp" %>
<%@ taglib uri="http://liferay.com/tld/util" prefix="liferay-util" %>
<%@ taglib uri="http://liferay.com/tld/captcha" prefix="liferay-captcha" %>
<%@ page import="com.liferay.portal.kernel.captcha.CaptchaTextException"%>

<portlet:actionURL name="basicFormDataWithCaptcha" var="basicFormDataWithCaptchaAActionURL" />
<portlet:resourceURL id="captcha" var="captchaResourceURL"/>

<liferay-ui:error
    exception="<%= CaptchaTextException.class %>"
    message="captcha-verification-failed" />
<aui:form method="post" name="basicForm" action="<%= basicFormDataWithCaptchaAActionURL %>">
    <aui:input name="firstName" >
        <aui:validator name="alpha"/>
    </aui:input>
    <aui:input name="lastName" >
        <aui:validator name="alpha"/>
    </aui:input>
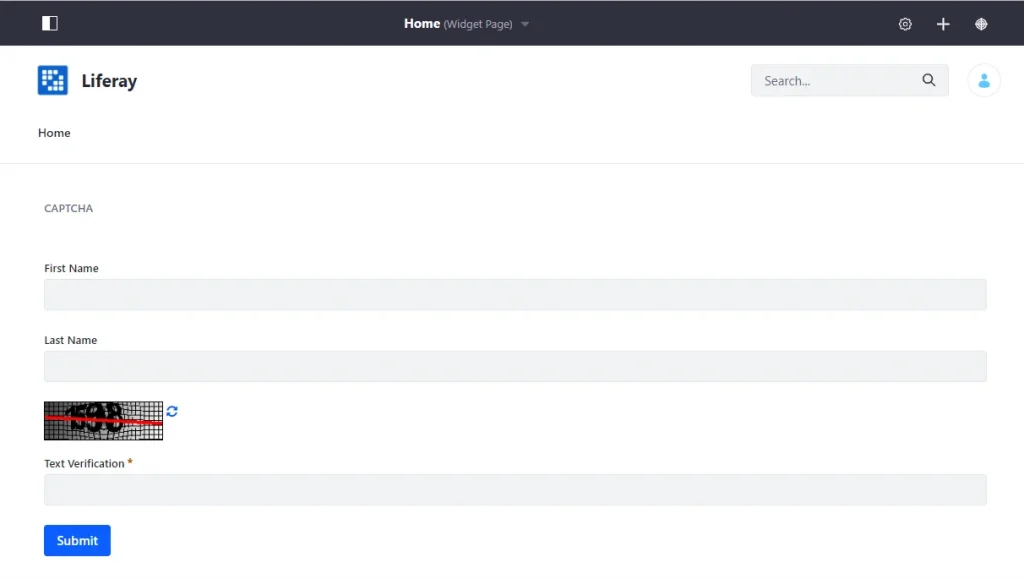
    <liferay-captcha:captcha url="<%= captchaResourceURL %>"/>
    <aui:button type="submit" value="Submit"></aui:button>
</aui:form>
3) Create Action method in CustomCaptchaPortlet
					// CustomCaptchaPortlet.java //
package ...;
import ...;

@Component(
    ...
)
public class CustomCaptchaPortlet extends MVCPortlet {
    private Log log = LogFactoryUtil.getLog(this.getClass().getName());

    @ProcessAction(name = "basicFormDataWithCaptcha")
    public void basicFormDataWithCaptcha(ActionRequest actionRequest, ActionResponse actionResponse)
        throws IOException, PortletException {
        String firstName = ParamUtil.getString(actionRequest,"firstName");
        String lastName=ParamUtil.getString(actionRequest,"lastName");
        log.info("First Name : " + firstName);
        log.info("Last Name : " + lastName);

        try{
            CaptchaUtil.check(actionRequest);
            log.info("CAPTCHA verification successful.");
        }catch(Exception exception) {
            if(exception instanceof CaptchaTextException) {
                SessionErrors.add(actionRequest, exception.getClass(), exception);
                log.error("CAPTCHA verification failed.");
            }
        }
    }

    @Override
    public void serveResource(ResourceRequest resourceRequest, ResourceResponse resourceResponse)
        throws  IOException, PortletException {
        try {
            CaptchaUtil.serveImage(resourceRequest, resourceResponse);
        }catch(Exception exception) {
            log.error(exception.getMessage(), exception);
        }
    }
    protected boolean isCheckMethodOnProcessAction() {
        return _CHECK_METHOD_ON_PROCESS_ACTION;
    }
    private static final boolean _CHECK_METHOD_ON_PROCESS_ACTION = false;
}
Output with CAPTCHA
Use Google reCAPTCHA in custom portlet
To integrate Google reCAPTCHA in Liferay please follow below steps
1) Get Site key & Secret key from Google reCAPTCHA
- Go to www.google.com/recaptcha in your web browser
- Click on “Admin console” button (Located at top-right corner)
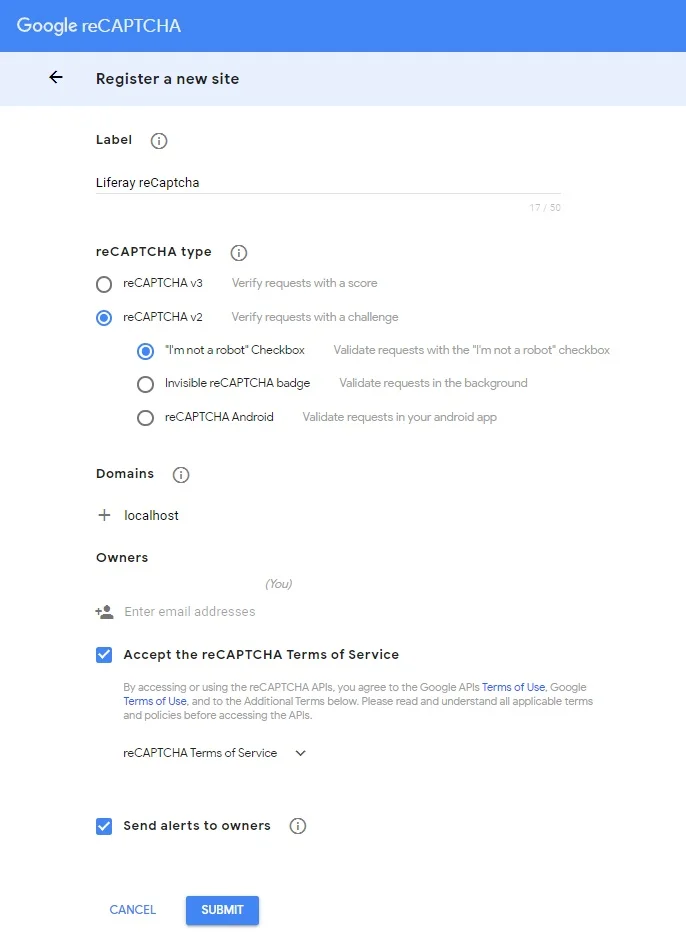
- Fill up your details in the form and then click on “Submit”
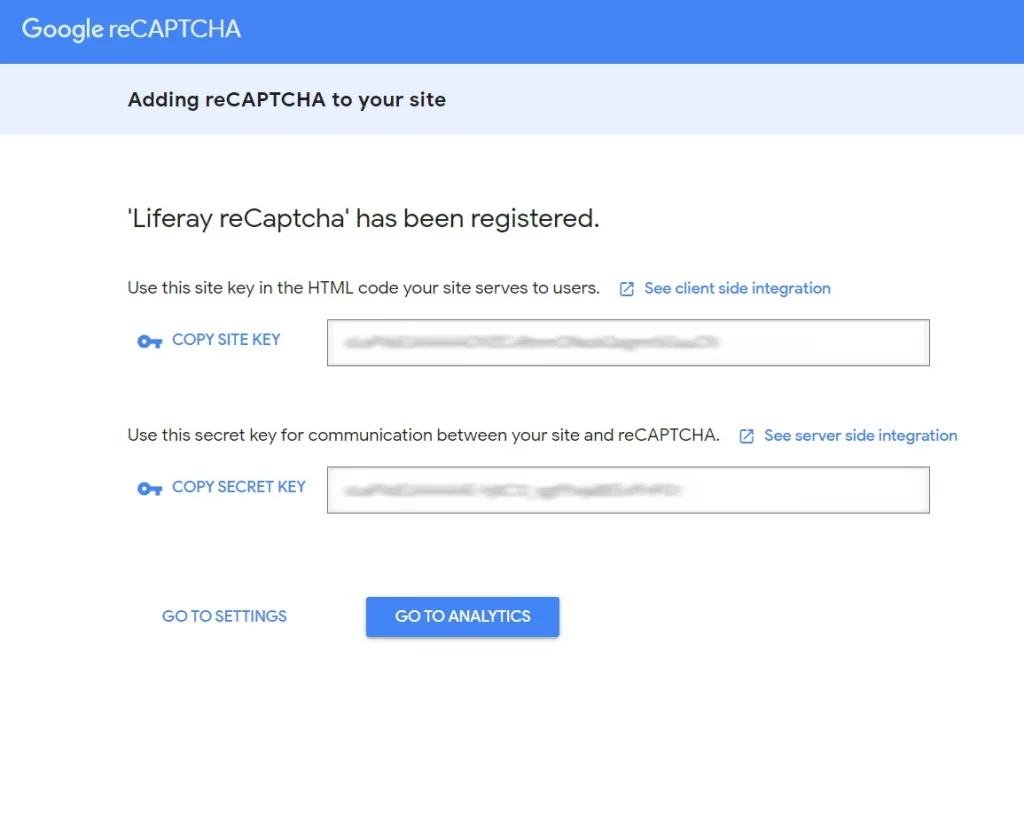
- You will get “Site key & Secret key” as below image. This you will require while configuring Google reCAPTCHA with Liferay
2) Enable Google reCAPTCHA in your Liferay
- Login as admin user
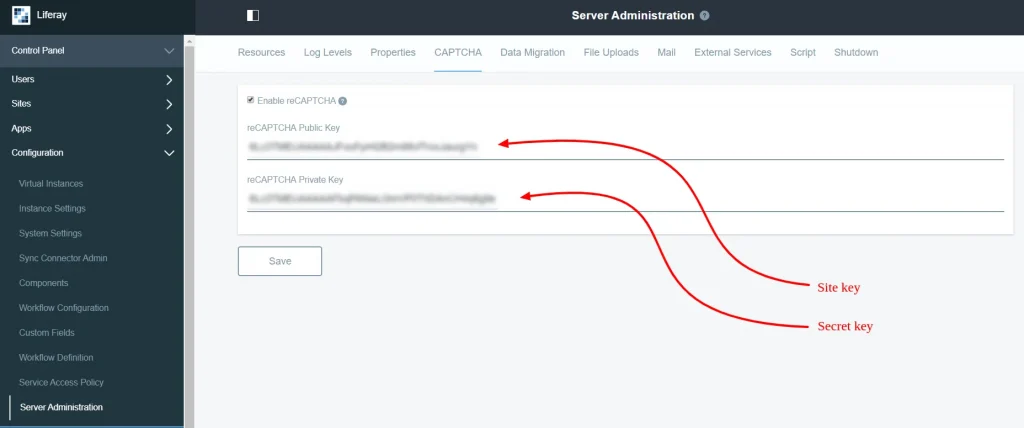
- Navigate to Control Panel → Configuration → Server Administartion → CAPTCHA
- Click on checkbox to “Enable reCAPTCHA”
- Enter “reCAPTCHA public key” and “reCAPTCHA private key”
You need to enter your “site key” in “reCAPTCHA public key” field, and “secret key” in “reCAPTCHA private key” field - Click on ‘Save’
- To test Google reCAPTCHA is properly configured or not. Logout from Liferay and go to Create Account page. You can see a default Liferay CAPTCHA is replaced with the new Google reCAPTCHA

3) Use Google reCAPTCHA in your Custom Portlet
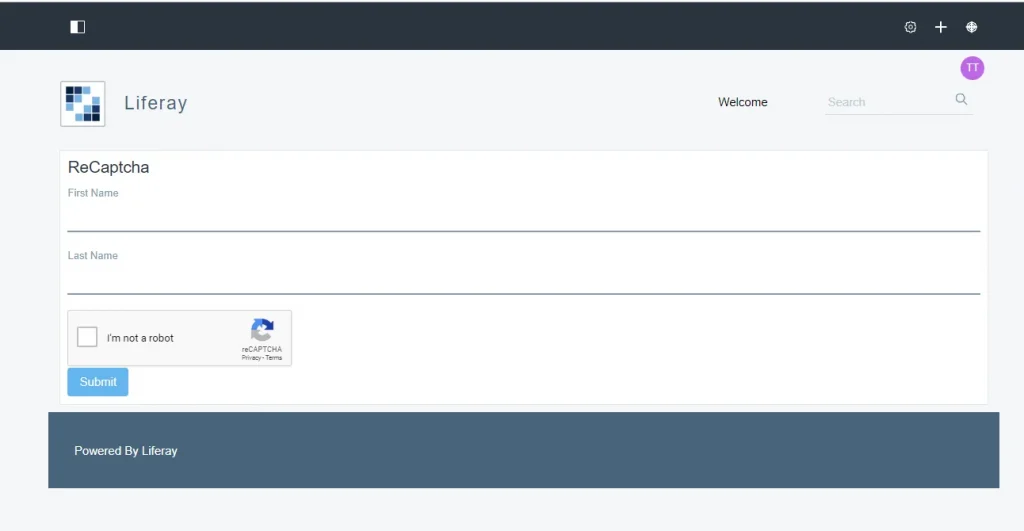
- Once you configure reCAPTCHA from control panel below code will render google reCAPTCHA
<liferay-captcha:captcha url="<%= captchaResourceURL %>"/>
- If we configure reCAPTCHA from Liferay control panel, Output of above ‘custom-captcha-portlet’ will look like below
